When it comes to electrical issues in your home, damaged wiring behind the walls can be one of the trickiest problems to deal with. Not only can it cause power outages, but if left unchecked, it could lead to serious safety hazards like fires or electric shocks. Fortunately, repairing a damaged electrical wire in the wall is not an insurmountable task if you follow the correct procedures.
In this electrical wire repair guide, we will walk you through the steps to repair electrical wire in drywall, explain splicing electrical wires in wall, and provide important insights on safety and compliance with the electrical code for wire repair.
Why Damaged Electrical Wires Are Dangerous
Electrical wiring inside your walls is responsible for powering everything from your lights and appliances to your heating and cooling systems. When wires become damaged, the risks increase significantly. A cut, frayed, or burnt wire can create a spark, which might lead to electrical fires. Common causes of wire damage include:
- Nails or screws piercing the wire during home improvements
- Rodents chewing on wiring
- Normal wear and tear over time
- Overheating due to overloaded circuits
Knowing how to fix electrical wire problems promptly and safely can prevent these hazards and restore the functionality of your home’s electrical system.
Is it Safe to Repair Damaged Electrical Wire in the Wall?
Before jumping into the repair process, it’s important to evaluate whether you should attempt this task yourself or call a professional electrician. Working with electrical systems can be dangerous, so make sure you follow safety precautions.
If you are unfamiliar with electrical systems, have no experience, or if the damage is extensive, it’s always best to call a licensed electrician. However, if you have basic electrical skills and feel confident, repairing a damaged electrical wire in the wall is a manageable DIY task.
Step-by-Step Guide: How to Repair Damaged Electrical Wire in Wall
If you’re determined to take on this project, here’s a step-by-step process to help you complete the job safely and effectively.
1. Turn Off Power
The very first step in any electrical repair is to turn off the power to the circuit. Head to your circuit breaker box and flip the switch that controls the specific circuit where the damaged wire is located. If you’re unsure which breaker controls the damaged wire, turn off the main breaker to cut all power in the house.
Important: Test the wires with a non-contact voltage tester to ensure that no current is running through them.
2. Locate the Damage
Finding the exact location of the damage is critical for effective repairs. There are a few ways to identify where the wire is damaged:
- Use a stud finder to detect electrical wires within the wall.
- Look for signs such as sparks, smoke, or inconsistent power flow from outlets or lights.
- If you recently nailed or drilled into the wall, check the areas around the puncture for signs of wire exposure.
In some cases, you may need to open up the wall. Use a drywall saw to carefully cut into the drywall where you suspect the wire is damaged.
3. Cut and Remove the Damaged Section
Once you’ve located the damaged wire, the next step is to cut it out carefully. Use wire cutters to remove the damaged part. Make sure to cut at least an inch of wire on both sides of the damage to ensure that you’re removing all compromised sections.
Tip: If the wire damage is localized to a small section and only one or two wires are damaged, you might not need to replace the entire length of the wire in the wall.
4. Splicing Electrical Wires in Wall
Now comes the part where you will splice electrical wires in the wall. Splicing involves connecting two sections of wire so that they function properly again. To do this:
- Strip the ends of the two wire sections using a wire stripper, ensuring the copper is exposed but not too much. About half an inch is ideal.
- Twist the ends of the wires together in a clockwise motion, ensuring the copper from both wires makes good contact.
- Use a wire nut to secure the connection and prevent it from loosening over time. Be sure the wire nut is tightened properly and covers all exposed copper.
If you’re splicing more than one wire, ensure that each connection is correctly made (e.g., black to black, white to white, ground to ground).
5. Secure the Wires and Close the Wall
Once you’ve spliced the wires and secured the connection, use electrical tape or wire staples to keep the wires in place and prevent them from moving or touching other objects inside the wall.
Then, close up the drywall. If you cut the drywall earlier, use drywall screws and joint compound to patch the hole and restore the wall’s integrity.
6. Test the Repair
Before finishing up, it’s important to test the repair. Turn the circuit breaker back on and check the repaired wire. You can use a voltage tester to ensure the circuit is live and working correctly. If everything checks out, you’ve successfully repaired the damaged wire!
Understanding Electrical Code for Wire Repair
When repairing electrical wires inside your walls, it’s critical to adhere to local electrical codes. Electrical codes are guidelines set by governing bodies like the National Electrical Code (NEC) to ensure safe wiring and prevent electrical hazards.
Here are a few things you should keep in mind when repairing electrical wiring:
- Proper Wire Gauge: Ensure the replacement wire matches the correct gauge for your electrical system.
- Code-Compliant Junction Boxes: Any junctions (where wires meet) should be inside a junction box to prevent shorts.
- Wire Insulation: All wires should have proper insulation to protect against electrical fires.
- Grounding: Make sure the ground wire is connected properly to the rest of the electrical system.
While you can repair minor electrical issues yourself, certain tasks, especially those that involve modifying electrical systems, may require permits or inspections.
Electrical Wire Repair Apex: When to Call the Professionals
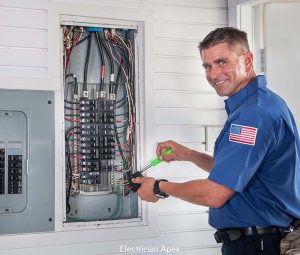
In some cases, the damage to the electrical wiring in your wall may be beyond what a DIYer can safely fix. If the wire is part of a larger system, or if you are unsure about your abilities, you may need to contact an electrical repair service like Electrical Wire Repair Apex to handle the issue.
A licensed professional will be able to assess the problem more thoroughly, ensure that the repair is up to code, and prevent future issues. It’s better to be safe and trust your home’s electrical integrity to a professional when necessary.
Conclusion: Keep Your Home’s Electrical System Safe
Repairing a damaged electrical wire in the wall is a delicate task that requires caution and precision. With the proper tools, knowledge, and adherence to safety guidelines, you can fix minor electrical issues. Always remember to follow the electrical code for wire repair and check that everything is properly installed to avoid future electrical hazards.
By following these steps to repair electrical wire in drywall, you’ll be able to restore power to your home quickly and safely. If you ever feel uncomfortable with the task or if the problem seems beyond your ability, don’t hesitate to call a professional like Electrical Wire Repair Apex to get your home back in working order.